Effective debugging
The one true way to do it

One of the core skills for all developers is effective debugging of bugs and problems, in both code and systems. In the new ‘AI era’, this could become an even larger part of your daily work in cases where the AI’s limited understanding falls flat. It is one of the critical steps any software engineer must take to rise from the junior ranks to senior positions; and in my humble opinion an absolute requirement for promotion from junior engineer.
And yet I still meet mid-career and even senior developers that seem to lack the basic mental model for effectively finding problems, acting like the drunkard who lost his keys down the street and searching for them under the street light… because that’s where the light is.
Here’s how to do it:
Goal
Your primary objective is to identify the location of the problem as quickly as possible. The tighter you can make it, the fewer lines of code you have to read to identify the root cause of the problem.
0. Reproduce
Make the problem happen on-demand, on a copy of the software that 1) you have the most control over, and 2) that is not relied on by other people.
The production environment is where most problems are first detected, and it is the worst place to start debugging: customers are using it, and you have the least amount of control. You can’t turn it off, can’t insert breakpoints, etc., without immediate consequences. Any environment that you can use for this is better than production: staging, acceptance, personal dev VM, or your laptop.
Do not proceed to step 1 unless you can make the problem appear on demand.
1. Map
Map the process steps that contain the problem. What are the moving parts that touch data related to your problem? Ideally, we have an end-to-end overview of the parts involved.
This step can be informal if you have a solid grasp of the system, but a whiteboard can still be helpful. You’ll need this picture if you want to involve others in the debugging process at some point, and you’ll quickly find that without visual aids, your understanding will differ significantly from your teammates.
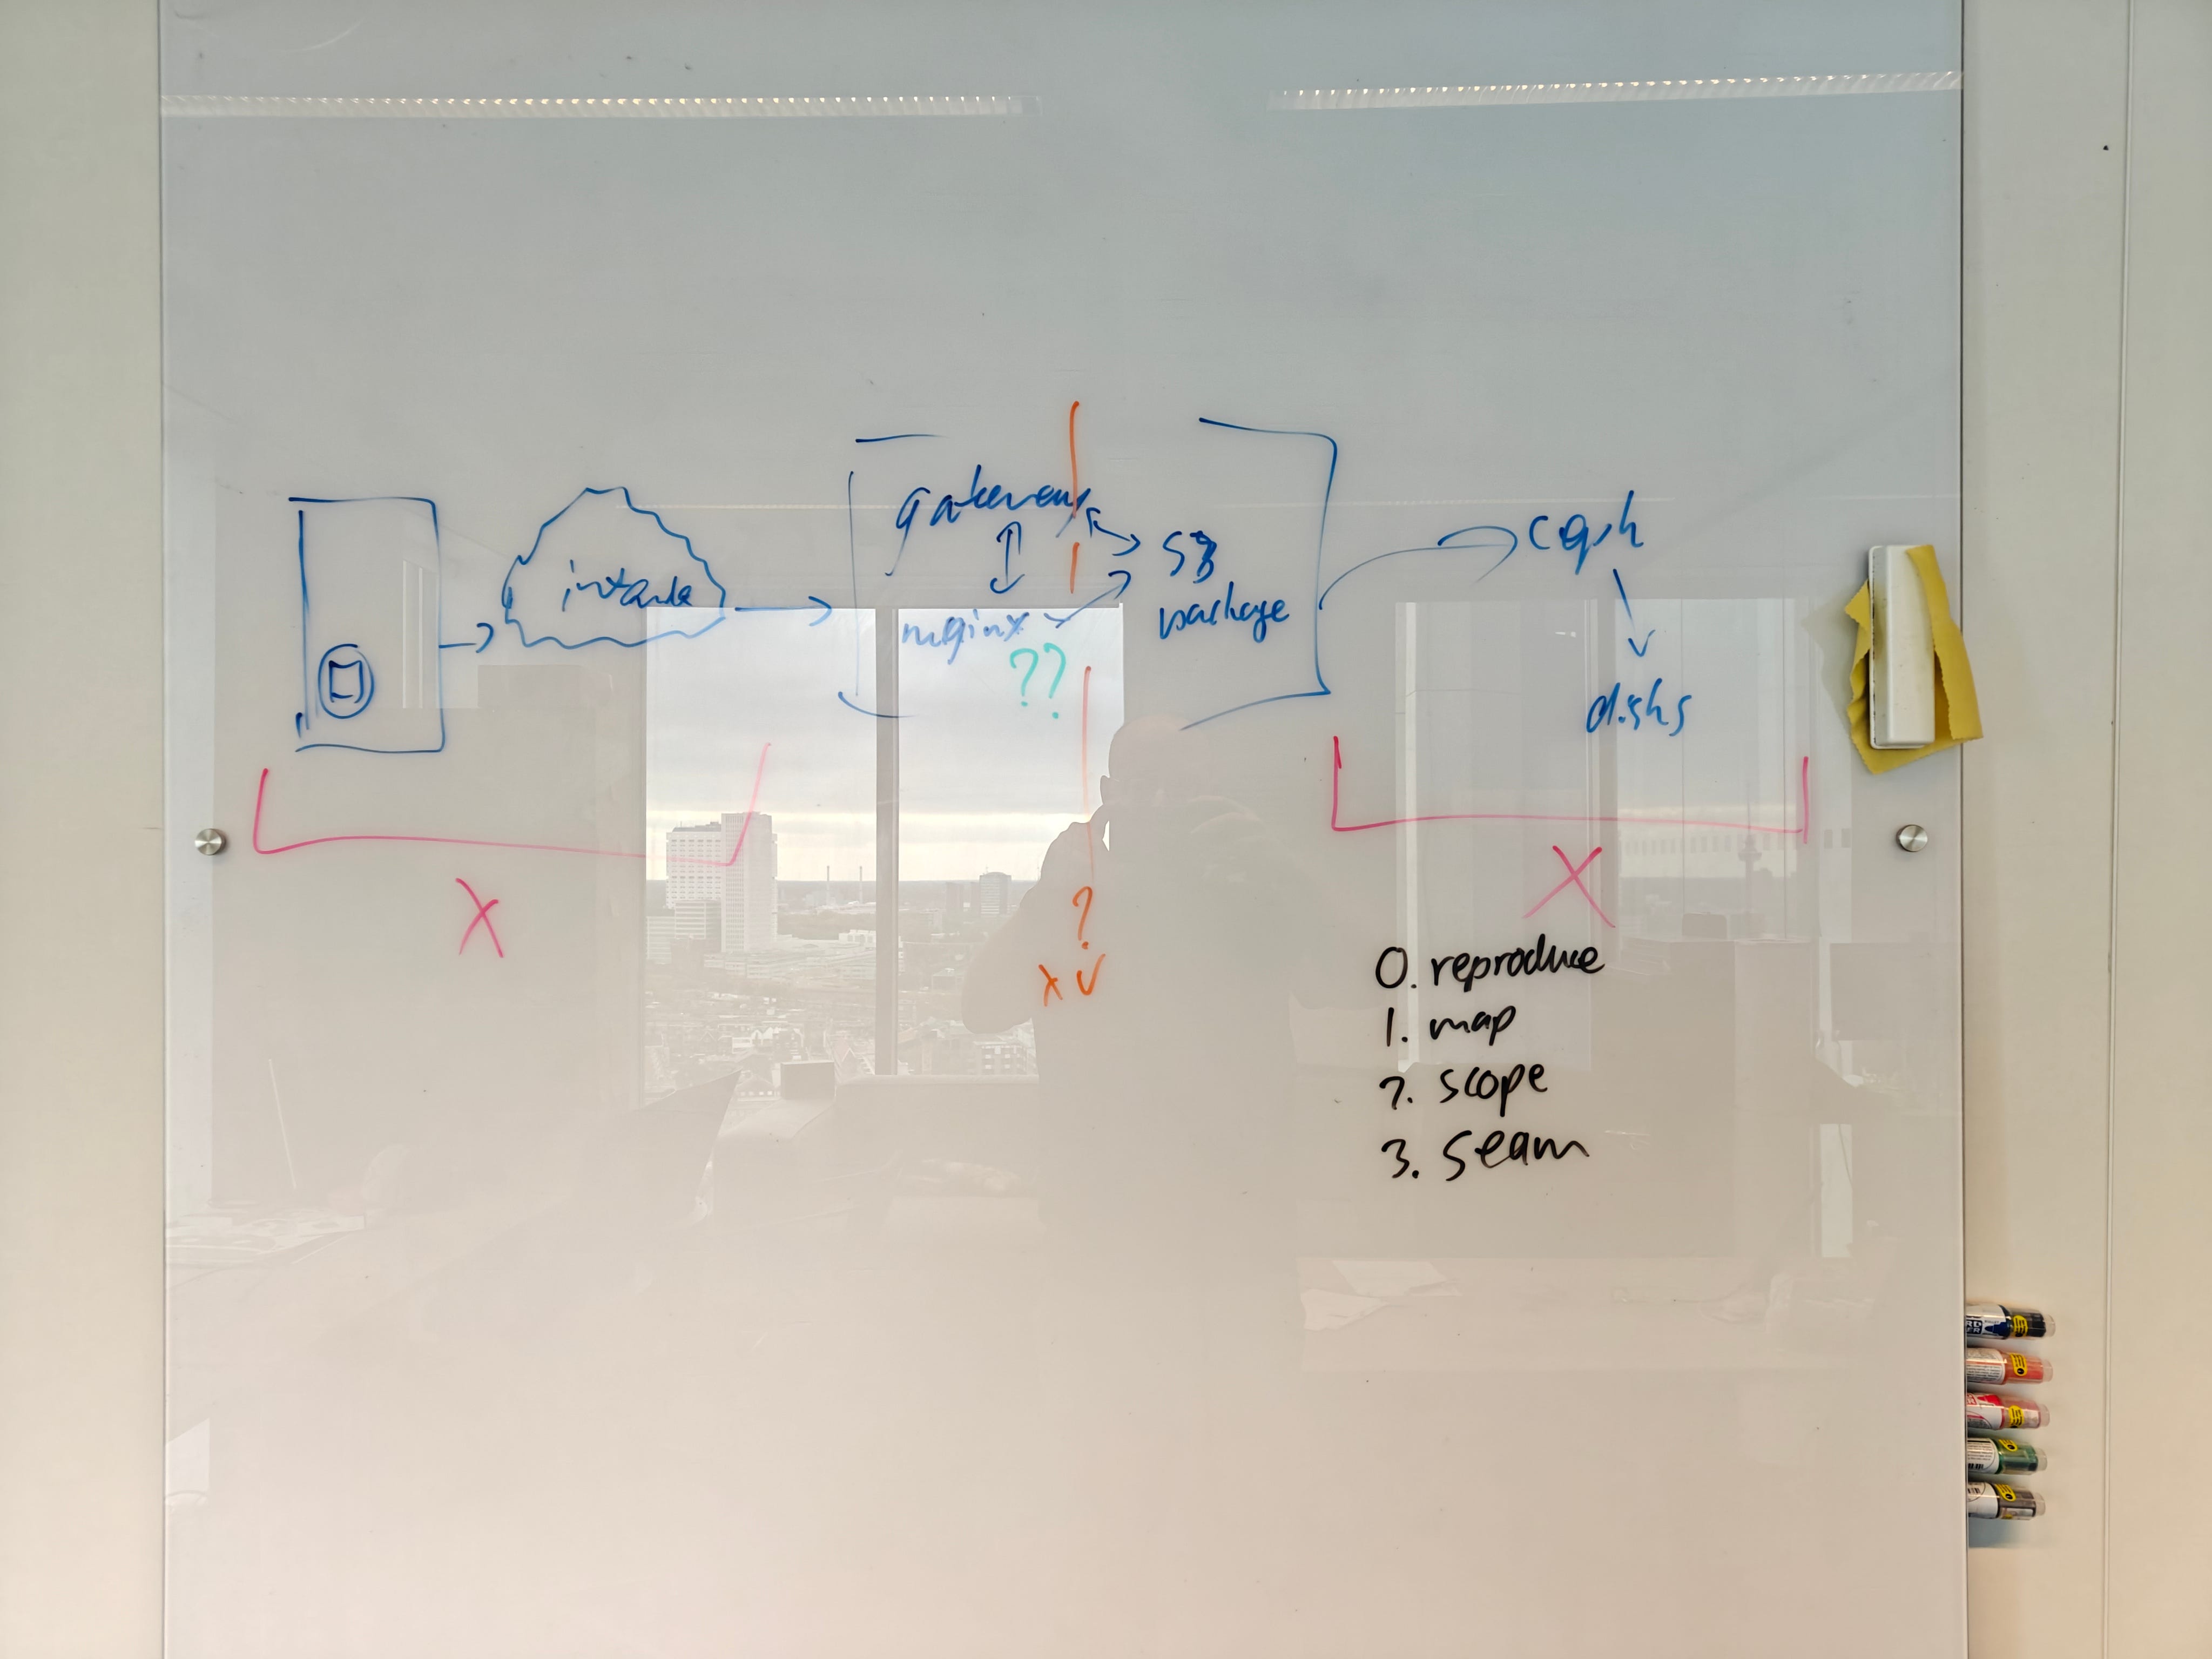
The level of detail required depends on the context: start at a high level and gradually add detail in iterations as you go.
2. Scope
Eliminate areas of the process map that cannot be the source of the problem. In the example above, the red X indicates parts of the process we know from experience or heuristics cannot cause the problem we’ve observed.
You will complete step 2 with a subset of the process that causes the problem. Try to make it as small as possible, but err on the side of including too many parts if you are not sure. You won’t be the first dev having to backtrack on “it absolutely cannot be in module X”.
3. Seam
Having determined your sub-process to investigate, we must further reduce it. The subset of your process starts from a point where everything is fine and ends at the earliest point where the problem can be observed.
Like a seam in a piece of cloth, a seam in the process is a place where we can break the whole thing in two, insert an extra piece, and then stitch it back together in a way that might be ugly, but still works. That extra piece provides visibility into the problem by allowing us to inspect intermediate results: logging variables, printing to STDOUT, or even better: setting a breakpoint.
By making a seam, we further subdivide the problem. If the problem or a part of the problem occurs at the seam, we reduce the problem space to the left. If it doesn’t, we reduce to the right side of the seam.
Make the seam as close as possible to the conceptual middle of the sub-process to reduce the problem space as much as possible. In the example above, the orange line is where we would ideally place our first seam: smack-dab in the middle.
Solve the problem
Left as an exercise to the reader, but usually fairly trivial once you find the exact location.
Good luck!